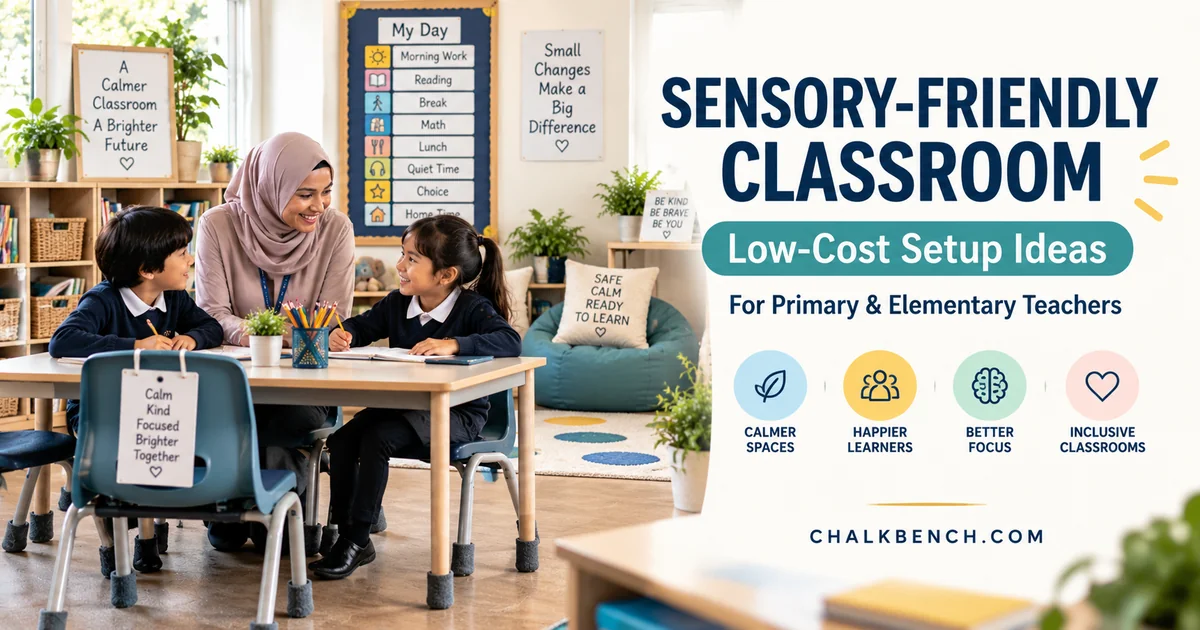
US & England • Inclusive Classroom Guide
Quick answer: A sensory-friendly classroom setup does not require expensive furniture, a separate sensory room, or a completely redesigned school. Start with the everyday barriers pupils notice: scraping chairs, bright glare, crowded displays, noisy transitions, limited movement options, and nowhere to reset. Low-cost changes—felt chair pads, a predictable visual timetable, an uncluttered working area, and a voluntary quiet spot—can make the room easier to navigate. For a sensory-friendly classroom, ask pupils what helps, trial adjustments, and review their impact rather than assuming one setup works for everyone.
This practical guide shares 15 low-cost sensory-friendly classroom ideas for primary school teachers in the UK and elementary teachers in the US. Each idea includes a first action, an accessibility or safety consideration, and a sign to look for during review. The examples are intended for mixed-ability classrooms, including autistic pupils, children with ADHD, and learners who experience sensory differences without a formal diagnosis.
Important distinction: Environmental adjustments can support access to teaching; they are not a clinical treatment or a substitute for an individual support plan or occupational therapy assessment. Pupils may experience sound, light, touch, movement and busy environments differently—even when they share the same diagnosis. The National Autistic Society recommends individualised, regularly reviewed reasonable adjustments. CAST’s Universal Design for Learning Guidelines likewise encourage flexible ways to participate while retaining meaningful learning goals.
In this guide
What makes a sensory-friendly classroom?
A sensory-friendly classroom is one where adults notice potentially overwhelming environmental demands and offer workable alternatives. Some children find the sudden scrape of thirty chairs painful or distracting. Others struggle with fluorescent flicker, a cluttered teaching wall, crowded lines, strong scents, or unexpected physical contact. Some learners seek movement or visual input instead of avoiding it. What feels calming to one pupil may feel dull, uncomfortable or distracting to another.
The goal is therefore flexibility and access, not a silent, bare room. Children still need language-rich instruction, attractive learning materials, purposeful play, collaboration and high expectations. The UK’s Education Endowment Foundation guidance on SEND starts with positive, supportive environments and excellent teaching for pupils with additional needs; classroom tweaks should help children participate in that teaching, not replace it.
When planning a sensory-friendly classroom, begin with three questions: Which classroom situation becomes difficult? What do pupils say or show about that situation? What is the smallest change we can try without removing access to the lesson? Consider a short observation of arrival, direct instruction, independent work, group work and transitions. Talk privately with the child, and when appropriate with family members, the SENDCo/SENCo, special educator, school psychologist or occupational therapist. Avoid interpreting behaviour alone as proof of a particular sensory condition.
15 low-cost sensory-friendly classroom ideas at a glance
Use this sensory-friendly classroom comparison to choose one or two changes rather than purchasing a large collection of sensory products. “No-cost” means a change in routine or arrangement; “low-cost” depends on existing school supplies, local prices and approval requirements.
| # | Sensory-friendly change | Budget | What to observe |
|---|---|---|---|
| 1 | Soften chair and table noise | Low-cost | Fewer disruptive scraping sounds |
| 2 | Prepare pupils for loud moments | No-cost | More predictable, manageable transitions |
| 3 | Offer a lower-noise work option | No-cost | Easier engagement with quiet tasks |
| 4 | Reduce glare and uncomfortable lighting | No-cost to school-approved | More comfortable viewing and participation |
| 5 | Simplify busy visual displays | No-cost | Easier locating of lesson information |
| 6 | Organise and label materials clearly | No-cost / low-cost | Fewer delays finding tools |
| 7 | Offer sensible seating choices | No-cost | Better task access and posture |
| 8 | Build in short movement opportunities | No-cost | Smoother return to learning |
| 9 | Create a voluntary calm option | No-cost / low-cost | Child can reset without exclusion |
| 10 | Show a simple visual timetable | No-cost / low-cost | Less uncertainty about what comes next |
| 11 | Give advance transition cues | No-cost | Fewer last-minute surprises |
| 12 | Plan quieter routes and clear pathways | No-cost | Safer, less crowded movement |
| 13 | Offer sensory tools by individual choice | Existing / low-cost | Tool helps rather than distracts |
| 14 | Provide alternatives for touch and scent | No-cost / low-cost | More participation in practical tasks |
| 15 | Ask, trial and review changes | No-cost | Support stays useful over time |
Sound in a sensory-friendly classroom: reduce avoidable noise
1. Put felt pads under noisy chair and table legs
In a sensory-friendly classroom, chair scraping is one source of sudden, sharp noise worth reducing. Try school-approved felt pads or durable fabric caps on the chairs that scrape most often. Check that the pads are securely attached, do not make furniture unstable, and will not become small loose parts in rooms used by young children. Start with a few seats near a pupil who identifies scraping as difficult, then check whether the adjustment makes a noticeable difference.
This is not just a decorative trick: the National Autistic Society gives felt pads on chair legs as an example of an inexpensive reasonable adjustment. The aim is to remove noise that has no teaching value, while keeping normal discussion, singing and collaborative learning available when those activities are appropriate.
2. Warn learners before predictable loud activities
If a music lesson, school bell, assembly rehearsal, blender in a cooking activity, or noisy cleanup is coming, explain what will happen, roughly when it will happen and what the child can do. A small “quiet now / louder soon / quiet again” cue can be enough for some pupils. For planned loud demonstrations, arrange a suitable listening distance or alternative participation in consultation with the pupil and school team.
Keep safety first: never disable alarms, block essential emergency signals or promise that a real fire drill will be silent. Explain the school’s evacuation plan using approved procedures. If a student needs individualized support for alarms, record the arrangement with the responsible staff. A warning is helpful because it restores predictability; it must not conceal genuine safety information.
3. Make a lower-noise working position available
A sensory-friendly classroom does not need to be silent all day. Instead, provide a reasonable choice during reading, writing or independent mathematics: a seat away from a noisy doorway, a quieter table for part of the task, or a short period of paired rather than whole-group work. Show the same learning goal and make sure the pupil can still see the board, hear essential instructions and participate with peers.
If headphones or ear defenders are appropriate, treat them as one possible option rather than a universal rule. Some children find them useful only during particularly loud activities; others find the pressure uncomfortable or miss speech. Check supervision, hygiene and school policy. Never make a child wear hearing protection as punishment or require it to remain on throughout instruction.
Light and visual information: make the important things easier to see
4. Check glare before changing every classroom light
To check lighting in a sensory-friendly classroom, stand where the child sits and look at the whiteboard, tablet, windows and overhead lighting. Can sunlight reflect directly into their eyes? Does the position make text hard to see? An inexpensive first step may be moving a desk, changing the viewing angle, using existing blinds appropriately, or reporting a visibly flickering fixture to facilities staff. Any electrical, window-covering or lighting change should follow school policy, fire rules and accessibility needs.
Turning down all the lights can make reading, lip-reading, mobility or vision harder for other pupils. There is no single “sensory-safe” brightness for every learner. Aim for adjustable, comfortable access to text and activities rather than a fashionable dim aesthetic.
5. Give visual displays a clear purpose
Sensory-friendly classroom walls do not need to be bare. However, when every available space contains bold lettering, layered posters and moving decorations, important information can become difficult to find. Keep current lesson cues, phonics charts or number lines in consistent locations and consider moving older displays away from the main teaching wall. Use sufficient contrast and legible type rather than competing colors and tiny text.
Try a “teaching focus zone” behind the board: what must pupils see from their seats this week? Store nonessential displays elsewhere or rotate them. Invite feedback from pupils who find either visual clutter or very plain walls uncomfortable. The goal is clarity, not aesthetic minimalism for its own sake.
6. Keep storage, signs and materials predictable
Simple labels on pencil tubs, manipulatives, book baskets and activity trays reduce the scanning and searching involved in getting started. Combine words with familiar icons where appropriate, keep frequently used items in reliable places, and ensure labels can be seen and reached by pupils with visual or motor disabilities. One clear tray for “start here” materials may be more useful than ten new organizers.
Teach the sensory-friendly classroom layout rather than expecting labels alone to solve everything. Model where pupils collect, use and return materials. Observe whether a student can begin work with less adult prompting. If a child cannot access a shelf, move the essential items; decorative organization is not a substitute for practical accessibility.
Space, posture and movement: offer options without creating hazards
7. Allow simple, stable seating choices
For sensory-friendly classroom seating, explore existing options before buying wobble stools or specialist chairs: a desk nearer the teacher, a position with fewer passers-by, a stable chair with appropriate foot support, or a supervised standing workspace where permitted. Some children concentrate better after a change of position; others prefer the same seat every day. Keep seating choices accessible to pupils who use mobility aids, and do not make a disability-related choice into a public reward.
Expensive seating products are not automatically more effective than a well-matched ordinary desk and chair. Ask what problem the seat is meant to address—noise, sightline, posture, movement or distraction—and judge it by whether the learner can engage in the actual lesson. Consult relevant school specialists when posture, balance or mobility is a concern.
8. Build purposeful movement into ordinary lessons
Movement in a sensory-friendly classroom does not have to mean a special sensory circuit. Invite pupils to stand to sort vocabulary cards, carry an appropriate stack of books, demonstrate a calculation on the board, or take a brief scheduled stretch between learning segments. Offer equivalent seated participation for pupils who need it. A discreet individual break pass can also help a pupil request a movement break without announcing a private need to the class.
Use movement to maintain access to learning, not as a replacement for the lesson or a reward to be withheld. Our ADHD classroom accommodations guide includes practical movement and transition examples. Explain how pupils return to a task, and observe whether the child comes back ready to participate. CAST encourages flexibility in movement and ways of responding, while the CDC includes movement breaks among options that can help some students with ADHD.
9. Set up a voluntary, supervised calm option
A calm corner in a sensory-friendly classroom can be a seat in a quieter part of the existing room, with an uncluttered view, a familiar book or a simple visual cue that helps the child communicate readiness to return. You do not need a commercial tent, elaborate lights or an expensive sensory wall. Explain to the class that the space is a normal support option, not a “bad behavior” place.
Never treat a calm area as seclusion. Children must not be shut inside, forcibly placed there, denied essential teaching, or left unsupervised contrary to school policy. Keep the area accessible, hygienic and away from blocked exits. Agree what happens if the pupil needs adult support or a different space; a soft beanbag alone is not an adequate safety or support plan.
Predictable routines for a sensory-friendly classroom
10. Post a short visual timetable pupils can actually use
A highly decorated full-day board is not always helpful. Begin with three or four relevant steps—“now, next, then, finish”—using written words, clear symbols, or both. Position the schedule where children can see it without leaving their work. Move the marker as each stage finishes, and update it honestly when plans change rather than leaving yesterday’s timetable on display.
In a sensory-friendly classroom, a visual schedule gives pupils information they can check independently, but it should complement spoken explanation and other accessible formats. For example, a child with a visual impairment may need an auditory or tactile version. Ask pupils whether the display clarifies the day or adds more information than they need.
11. Give a transition warning and a clear first step
“Pack up now” can feel abrupt when a child is deeply engaged or already overloaded. Try an advance cue such as “In five minutes, we will put away the counters. First, finish this example.” A visual countdown, an agreed hand signal or a short transition checklist may work. Some pupils need more time than others; the cue should be consistent but flexible enough to respect the individual.
During sensory-friendly classroom transitions, pay particular attention to changes in noise and crowding, not just the clock. Transition difficulties may come from the scrape of furniture, queuing, loss of a preferred activity or not knowing the next adult. Name the next location and activity. Avoid surprising pupils by changing a familiar routine without explanation when an advance explanation is possible.
12. Plan clear routes through crowded spaces
Check sensory-friendly classroom routes as a child would: from the door to their desk, from the desks to the carpet, and from the room to the washroom or playground. Remove unnecessary boxes, dangling decorations and furniture that narrows walkways. Where allowed, offer an agreed approach to entering or leaving a busy room without being pushed into the most crowded moment.
This adjustment benefits wheelchair users and children with other physical access needs as well as pupils who find unexpected touch difficult. Do not create an unapproved “special exit,” block emergency routes or ask a pupil to travel without appropriate supervision. Any change to movement between rooms must match school safeguarding and evacuation procedures.
Personal choice: match supports to the learner, not the label
13. Offer a small, optional menu of tools
When choosing sensory-friendly classroom tools, start with what the school already owns. A familiar pencil grip, paper reading guide, simple fidget, plain work mat or approved ear defenders may help one pupil in a defined situation. Introduce only one tool at a time; teach what it is for, when it can be used and how to handle it safely. Some tools become another distraction, create noise for classmates or are uncomfortable for the intended pupil.
There is no evidence-based reason to buy a full sensory toolkit for every student or claim that one gadget “treats” ADHD or autism. Consider age-appropriate small-part risks, allergies, hygiene, individual therapy advice, lesson access and the school’s purchasing rules. A tool that does not help after a fair trial should be replaced or removed from that student’s routine without embarrassment.
14. Provide alternatives for unpleasant touch or strong scents
In a sensory-friendly classroom, some children enjoy finger painting or scented play; others find glue, sticky textures, perfume or unexpected contact distressing. Offer a brush or tool for a messy activity when touching the material is not itself the assessed skill. Avoid introducing strong room fragrances or essential oils as a blanket “calming” strategy; classmates may have asthma, allergies, headaches or scent sensitivities.
Talk through activities before they begin and ask about comfortable materials or gloves where school policy permits. Respect consent and personal space in lines, carpet activities and cooperative tasks. The adjustment should preserve the learning aim: a pupil can explore color mixing with a tool, for example, without needing to tolerate paint on their fingers.
15. Ask pupils, trial one change and review what happens
The strongest starting point is curiosity. Privately ask: “When is this room hardest to work in?” “Would a quieter seat, less glare or a break help?” “How will we know?” For young children or pupils who communicate differently, use picture choices, observations and appropriate family input. Agree one or two changes, identify the target task, and review after an appropriate period.
A useful measure may be whether the child can begin independent reading, remain in a group activity or return from a transition with less distress. Look for engagement and self-reported comfort rather than demanding visible stillness. Record the pupil’s perspective alongside staff observations, and revisit the plan whenever the timetable, staff, classroom or needs change. A sensory-friendly classroom depends on ongoing inclusion, not a one-time room makeover.
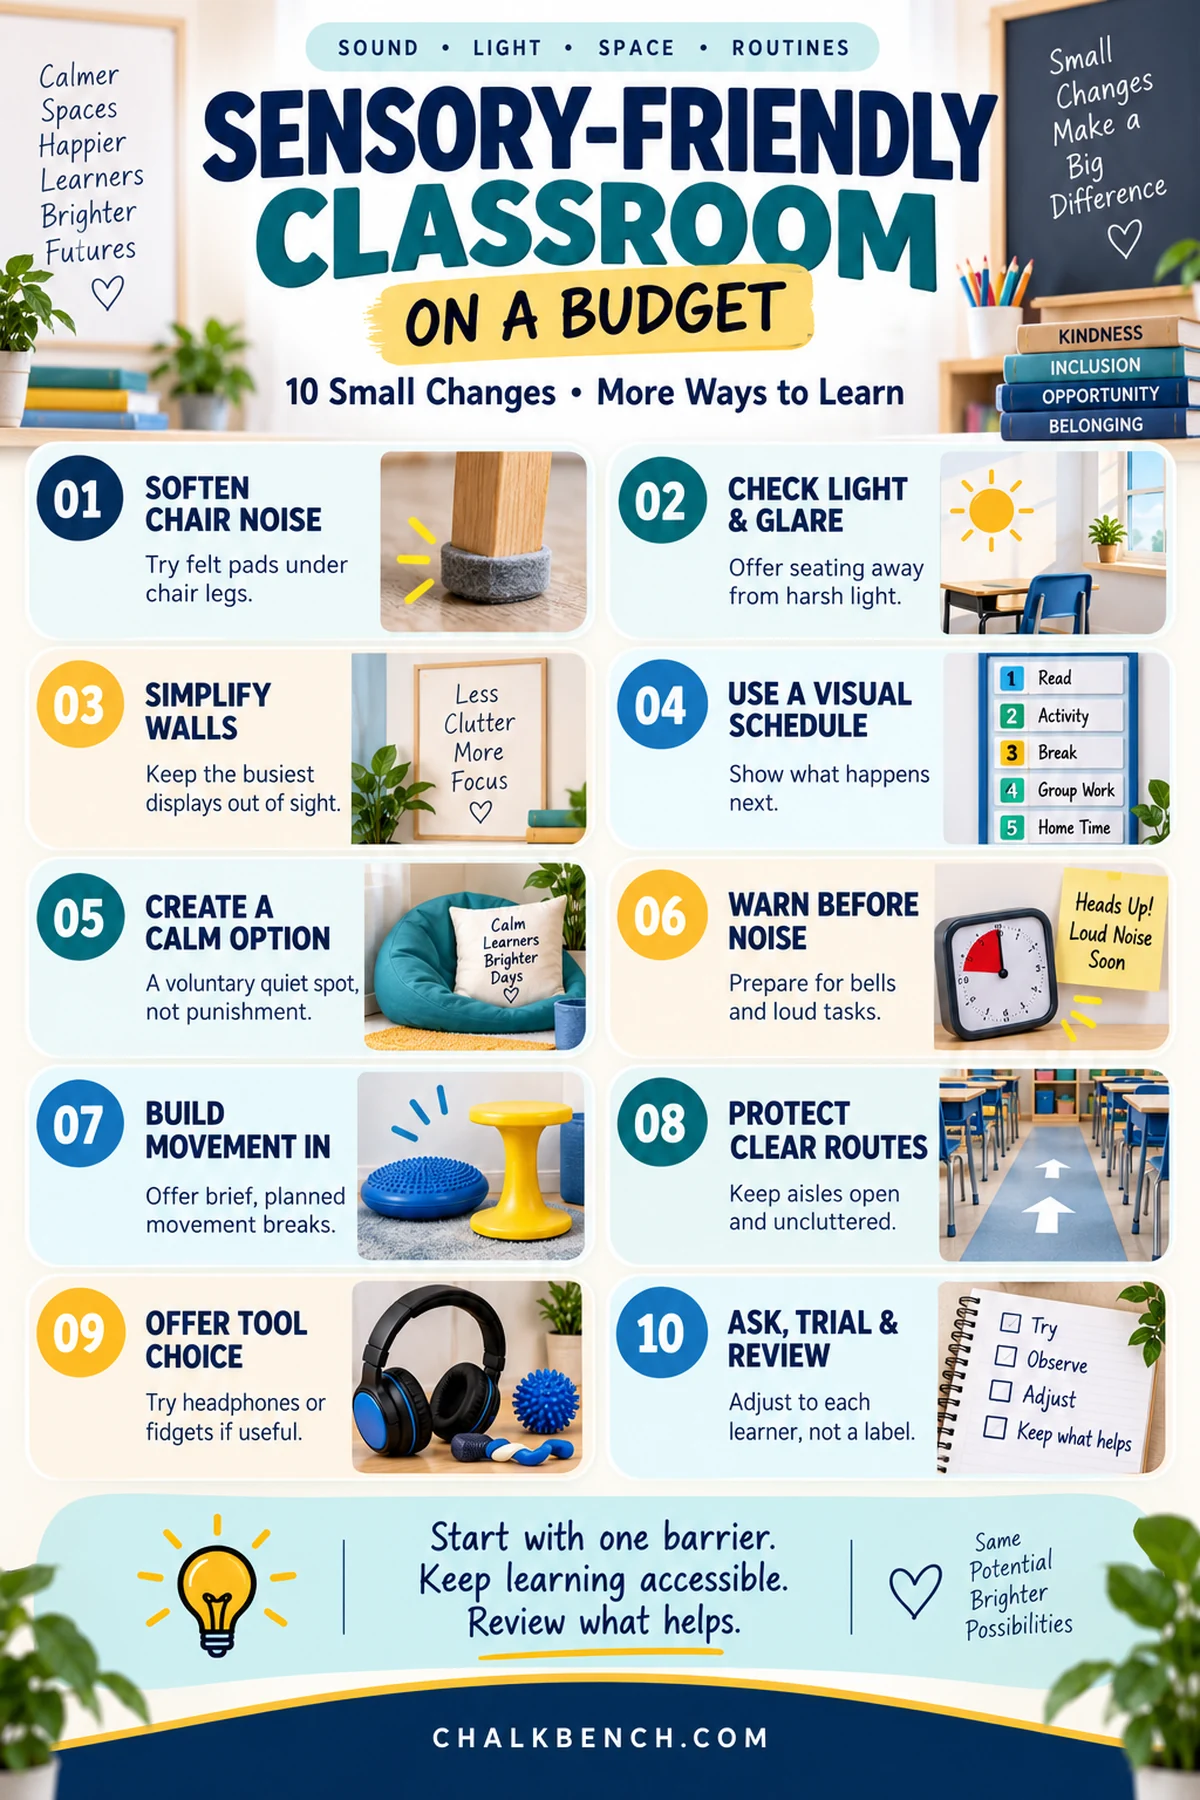
How to create a sensory-friendly classroom on a small budget
Planning a sensory-friendly classroom can easily begin with a shopping list. A better approach is to start with an access problem and use the least disruptive appropriate response. Many improvements are changes in classroom practice rather than purchases. Where supplies are needed, obtain school approval and consider the quality, safety and durability of materials.
| Budget level | Practical options | Check before implementing |
|---|---|---|
| No-cost | Change a seating position; reduce display clutter; show “now/next”; warn before noise; add movement pauses; adjust a queue. | Maintain visibility, inclusion, access and school routines. |
| Low-cost | Secure felt pads; reusable labels; simple cue cards; a sturdy storage tray; existing printed visuals. | Check small-part hazards, durability, cleaning and school purchasing approval. |
| Needs school or specialist approval | Changes to lighting or fixtures; specialist seating; acoustic modifications; individual protective or therapeutic equipment. | Consult facilities, safety staff, SEND/special education team and appropriate professionals. |
A realistic five-day starter plan
- Day 1 — Listen and observe. Identify one part of the day where a child is missing access to instruction. Check noise, brightness, movement and unpredictability from the pupil’s perspective. Do not make a diagnosis from behaviour.
- Day 2 — Make a reversible change. Try adjusting a seating position, teaching-wall display or transition cue. Keep academic content and access to peers intact.
- Day 3 — Teach the new routine. Model how to read a visual schedule or request a brief reset. Explain the change in respectful, non-stigmatising terms.
- Day 4 — Gather specific feedback. Ask what helped and what felt worse. Look at the exact classroom task rather than making broad statements such as “much better behaved.”
- Day 5 — Decide what to keep. Maintain effective adjustments, alter those that do not help, and share relevant information with the child’s authorised support team. Continue monitoring beyond the first week.
Review your sensory-friendly classroom: what to measure
A sensory-friendly classroom review should focus on access rather than appearance. Before a change, note one observable difficulty and the student’s own view where possible. For instance: “During 10-minute independent reading, the student leaves the working area several times when the nearby chairs scrape.” Introduce felt pads or a quieter position, keep ordinary lesson expectations stable, and review with the pupil.
Useful indicators include whether the student can start a task, hear and understand directions, access a reading text, take part in a group, navigate the room safely, or return to learning after a short reset. You can use a simple one-page record with the columns Barrier / Adjustment / Pupil feedback / Staff observation / Next step. Avoid publishing personal health information on a public classroom display.
If the child reports that the new “calm” corner feels isolating, that feedback is important even if the room looks more orderly to adults. Some pupils may not wish to use a visible support that marks them as different. Offer dignified alternatives. The National Autistic Society notes that sensory experiences vary and may change with fatigue, stress and context; revisit what works rather than assuming a successful strategy is permanent.
Sensory-friendly classroom mistakes to avoid
- Buying first, asking later: expensive sensory furniture or multiple fidgets may not address the student’s actual barrier.
- Assuming darkness is calming: lowering light for one pupil can create difficulties for reading, visual access or safety for another.
- Using the quiet corner as punishment: a regulation choice should never be a locked, forced or unsupervised isolation space.
- Expecting constant stillness: harmless movement or stimming is not automatically a behaviour to eliminate.
- Prescribing headphones to everyone: the child may miss instructions or find the headset uncomfortable.
- Using scented oils or unapproved weighted items: these raise individual health, safety and specialist-advice questions and are not universal classroom solutions.
- Letting displays, rugs or furniture block exits: accessibility and fire safety override decorative goals.
- Removing challenge: sensory-friendly adjustments should help pupils work toward appropriate learning goals, not quietly deny instruction.
US and UK: how classroom adjustments relate to formal support
In US public schools, some students with disabilities are entitled to accommodations or services through an Individualized Education Program (IEP) under IDEA or under Section 504, depending on eligibility. A sensory adjustment may be part of an individual plan, but the existence of a sensory difference does not automatically establish IEP eligibility. The CDC’s classroom guidance offers practical examples, including reducing distractions and allowing movement, while acknowledging that evidence for individual accommodation types varies. ChalkBench’s IEP vs. 504 plan guide explains the differences between the two US support routes. Follow the student’s documented support, district policies and evaluation processes; classroom-level experimentation cannot override required services.
In England, a school’s responsibilities concerning disabled pupils include reasonable adjustments under the Equality Act 2010; schools also use SEN support and, where applicable, Education, Health and Care Plans. An EHCP is not necessarily required before a school considers a reasonable adjustment. For the England assessment process, see our EHCP assessment guide. The official GOV.UK education-rights guidance explains the duty and the distinction between school reasonable adjustments and accessibility planning. Scotland, Wales and Northern Ireland have different education frameworks, so apply local guidance rather than treating “UK” as one uniform SEND process.
Across settings, engage the learner and family, involve the relevant school staff, implement agreed support consistently and maintain appropriate confidentiality. An inclusive room benefits from good universal design, but individual disability-related entitlements may require more than universal classroom changes. For a related ChalkBench discussion of preserving a shared lesson objective while adapting learning materials, see AI tools for differentiated instruction.
Sensory-friendly classroom audit checklist
Use the sensory-friendly classroom questions below during a short room walk-through, preferably with feedback from the children affected. You can print this article or paste the checklist into your planning notes; no paid printable is required.
- ☐ Can pupils hear instructions without avoidable background noise?
- ☐ Are sudden, predictable loud events explained in advance where appropriate?
- ☐ Can learners see the board and their work without uncomfortable glare?
- ☐ Is the main teaching wall understandable rather than unnecessarily crowded?
- ☐ Are essential materials easy to reach, recognise and return?
- ☐ Can pupils use suitable, stable seating or posture options?
- ☐ Are movement breaks or alternative responses available when needed?
- ☐ Is any calm spot voluntary, supervised, accessible and never punitive?
- ☐ Is the day’s routine clear, including changes and transitions?
- ☐ Are paths, doors and emergency routes safe and unobstructed?
- ☐ Are sound, touch and scent adjustments discussed with the pupil?
- ☐ Do we review whether each adjustment improves learning access?
Sensory-friendly classroom FAQs
1. What is a sensory-friendly classroom?
It is a classroom that reduces avoidable environmental barriers and provides reasonable ways for pupils with different sensory needs to participate. It may include flexible seating, clearer displays, predictable routines, quieter work options and accessible movement opportunities. It is not a single decor style or a medical intervention.
2. Can a sensory-friendly classroom be created with no budget?
Yes, many useful first steps cost nothing: rearranging a seat, reducing unnecessary display clutter, warning before a transition, or allowing short planned breaks. Some practical changes, such as felt pads or visual labels, may need inexpensive supplies and approval from the school.
3. Do I need a sensory room or a tent?
No. A supervised, voluntary calm option within a normal classroom may meet an individual need. A separate sensory room or tent is not a prerequisite, and any specialist provision must follow the student’s plan and relevant school safety, accessibility and supervision arrangements.
4. Are sensory-friendly classrooms only for autistic children?
No. Accessible environments can support pupils with a wide range of needs, including some children with ADHD, anxiety, hearing or visual differences, and those who simply find particular classroom conditions hard. However, the adjustment should match the child and the task; diagnostic labels alone cannot determine the correct support.
5. Should teachers remove all posters from classroom walls?
Not necessarily. Useful visual teaching aids can help many learners. Try reducing competing information around the main teaching area while retaining accessible, current, relevant displays. Ask pupils whether the room is easier to use after the change.
6. Do noise-cancelling headphones help every child with sensory needs?
No. Some children find selected headphones or ear defenders useful during particular loud activities; others dislike wearing them or need unfiltered access to spoken instruction and safety cues. Consider them an optional, individual support and follow school guidance.
7. Is a calm corner the same as a sensory room?
No. A calm corner is usually a simple area or seat in an ordinary classroom for a brief, voluntary reset. A sensory room may contain specialised environments or equipment with different supervision and planning needs. Neither should be used to punish, isolate or exclude a child from required teaching.
8. What is the most useful first adjustment for a teacher to try?
Start with the barrier pupils actually report. If the difficulty is chair scraping, reduce that noise. If it is an unpredictable transition, try a visual “now/next” cue and advance warning. A small targeted improvement is easier to evaluate than changing the entire classroom in one afternoon.
9. How can I tell whether the classroom changes are working?
Ask the student, observe participation in a defined activity, record whether access improves and revisit the change after a short trial. Success may mean a child can read, collaborate, move safely or return to a task with greater comfort—not merely that the classroom appears quieter to adults.
Build a sensory-friendly classroom around real needs
A sensory-friendly classroom setup is less about buying calming products and more about designing the day thoughtfully. Reduce unnecessary noise, control glare where possible, organise what pupils need to see, offer dignified choices and explain transitions. Most importantly, treat each change as a hypothesis to test with the child, not a universal solution. Small, reviewed improvements can make a classroom easier to access while keeping ambitious teaching and warm relationships at its centre.
Sources and further reading
- National Autistic Society — Reasonable adjustments for autistic pupils’ sensory differences (school examples and individualised adjustments).
- National Autistic Society — Autism and sensory processing (variability in sensory experiences and common school triggers).
- CAST — Universal Design for Learning Guidelines 3.0 (flexible participation and accessible design).
- Education Endowment Foundation — Special Educational Needs in Mainstream Schools (evidence-informed inclusive teaching).
- Centers for Disease Control and Prevention — ADHD in the Classroom (school accommodations and individual differences).
- GOV.UK — Disability rights: Education (England/Wales school disability protections and reasonable adjustments context).
Editorial note: Sensory-friendly classroom sources and page availability checked 14 October 2026. Suggestions are practical educational options, not individually tested interventions, medical advice or a claim that all listed adjustments have equal research support. Local rules, pupils’ individual plans and professional recommendations take priority where relevant.
By M. Danish · ChalkBench